Writing a Kubernetes Operator: From Zero to Hero
Introduction
In this article, I am going to explain in detail how to create your own Kubernetes operator from zero. Operators are software extensions that make use of the custom resources (or kind in k8s paradigm) to manage the applications. To know more about operators please read the official documentation.
In dummy language, let's say we have a HelloApp application. To deploy the HelloApp application we will create the below k8s resource.

Note the kind: HelloApp is our custom resource definition (CRD) and the code that handles this CRD is our custom Operator (or Controller). And the focus of this article is to create this Operator (or Controller) from zero.
The Myth
Before I started creating an Operator, I thought that Go was the only language that was meant for writing Operators. But it's a myth.
You also implement an Operator (that is, a Controller) using any language / runtime that can act as a client for the Kubernetes API.
Check this screenshot from k8s documentation itself.

Kubernetes itself is a massive monitoring system. All its functionalities can be accessed through the APIs (the API Server). So, if we can write an application that can access (client) to the k8s API Server, our application can do the necessary actions to become an Operator. So, language does not matter to implement an Operator. However, the Go lang, being the native language of the k8s runtime and due to its vast amount of libraries present for Operator implementation, it's the most preferred one for building operators.
Softwares needed for this tutorial
The following software will be required for this tutorial.
- Go lang (1.16)
- Operator SDK (1.5)
- Kind
- Visual Studio Code with Go plugin
Tutorial Flow
I will divide the article into the following parts to make it modular.
Part1: Creating the Operator Project
Part2: Implement the Operator Logic
Part 3: Generating CRDs
Part 4: Installing the CRDs
Part 5: Running the Operator outside the Cluster
Part 6: Debugging the Operator outside the Cluster
Part7: Running the Operator inside the Cluster
Part 1: Creating the Operator Project
We are going to use the Operator SDK to create the project structure. At the moment of writing the article, I was using Operator SDK version 1.5. To know in detail how to create a project using the SDK please read this official documentation. For the sake of brevity, I will explain the basic steps only to create the project.
$ mkdir demo-operator
$ cd demo-operator
$ operator-sdk init --domain anupam.com --repo github.com/anupamgogoi/demo-operator
Create the API and the Controller
$ operator-sdk create api --group apps --version v1 --kind HelloApp --resource --controllerWith the above commands, our minimal project structure is ready to work on.
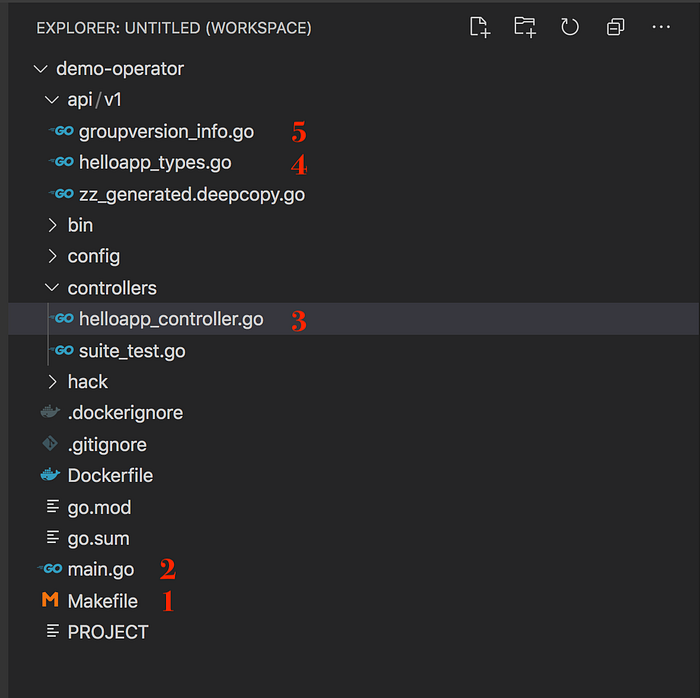
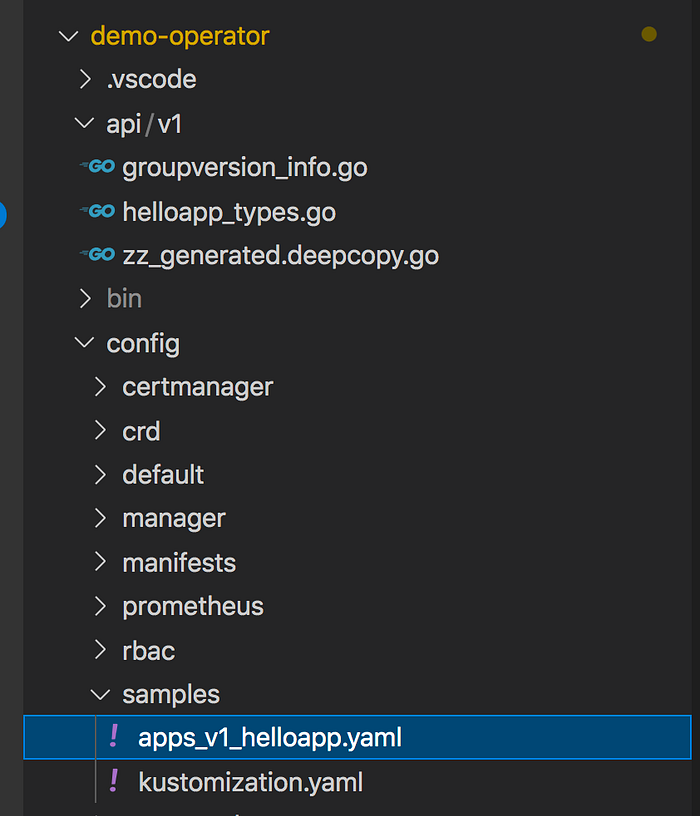
A brief notes on the important files created.
- It's the Makefile with all the necessary commands we need to generate the artifacts for the operator. Execute make help and it will show all the available commands available to execute.
- It's the central point of entry to the operator that contains the main function. Also, the central point of entry for debugging the operator in the local cluster.
- The controller. The main logic of the operator goes here.
- The structure for our custom resource.
- The group and version info we specified during the creation of the operator. To know more about the group and version please read this official documentation.
Part 2: Implement the Operator Logic
Our operator logic is very simple. When the below CRD is applied, the operator (controller) should create a deployment of the kind HelloApp with the number of pods specified in the spec.size

The complete source code can be found in this repository. So our Spec has only two fields namely image and size. To add them to the spec, edit the file [4] showed in Part 1 of the article.
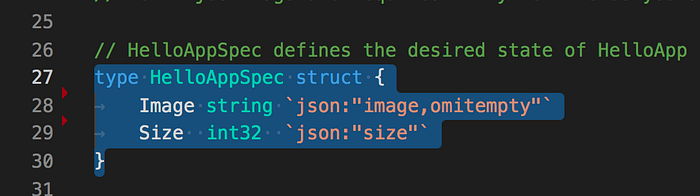
The controller logic can be found here. It's doing no magic. First, it checks if there is deployment for the HelloApp and if not it tries to create the deployment. Eventually, it checks if the number of pods is the same as we expect in the spec.size and if not create more pods. That's it. To know more about the API reference, please read this documentation.
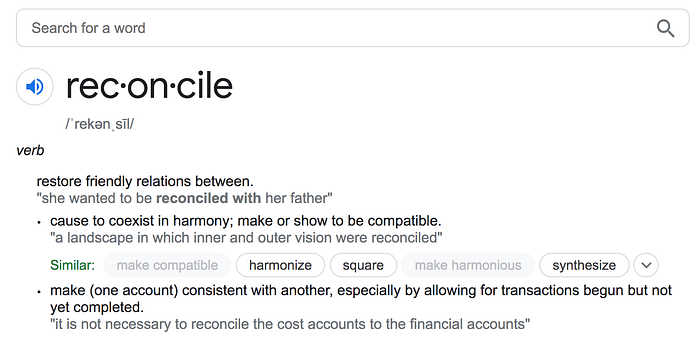
The controllers implement the Reconciler interface which exposes the Reconcile method. The Reconcile function is called for cluster events like CRUD operations and thus it can compare the actual status of the resource (kind) with the expected status (spec) and then if necessary reconcile it.
main.go
When the main.go is generated by the Operator-SDK it creates some extra stuff. For simplicity, I removed the extra stuff and left only what is necessary to run the operator. Take a look at the main.go file.
In the main.go file, there are the below codes. This is the most important part of the code.
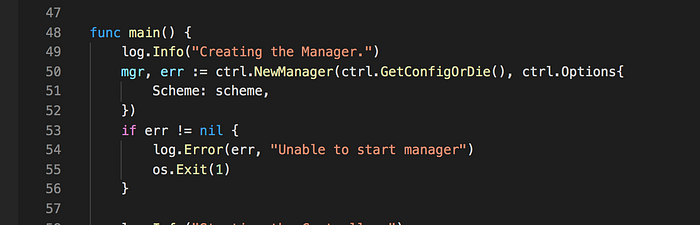
ctrl.GetConfigOrDie() will try to read the k8s cluster config from ~/.kube/config file and based on that it will get the connection information. Here is how a ~/.kube/config looks like.
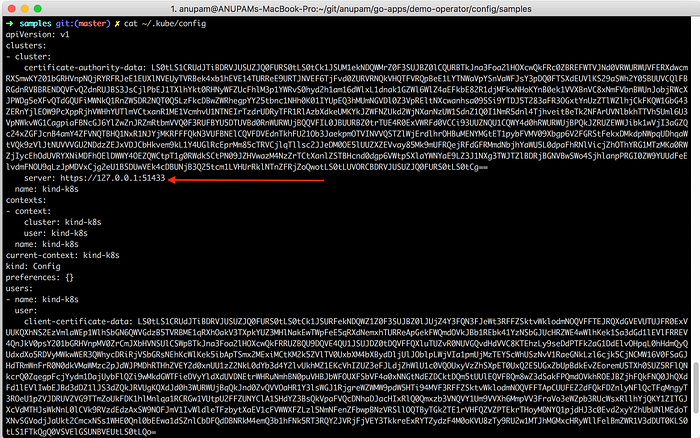
You can see that the config file has information such as server IP, certificate, etc. This is the most important thing. The GetConfigOrDie() method will read this information and based on that ctrl.NewManager() will create the manager for our controller. The rest of it is just calling the APIs of the K8s API Server. That's the magic. Just take a look into the main.go file and the things will be crystal clear.
Even the kubectl CLI uses the API calls to the k8s API server. Just execute the below command in the console and you can verify.
$ kubectl get nodes --v=8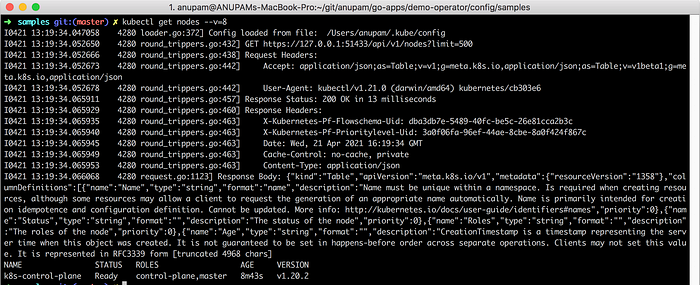
Part 3: Generating CRDs
At this point, the logic of our HelloApp controller is ready. Now, we will need to generate the CRD for it. Go to the root of the project demo-operator and execute the below command.
$ make manifestsIt will generate the CRDs for us in this location.
~/demo-operator/config/crd/bases
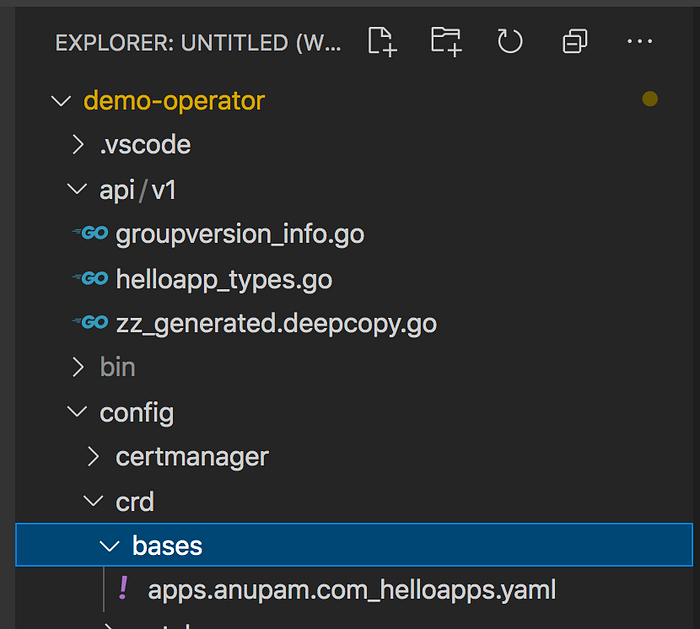
Also, in the ~/demo-operator/config/samples directory, it will generate a sample for us.
Part 4: Installing the CRDs
Before you can run the operator you need a local cluster. Use kind to create a cluster in your local host.
$ kind create cluster --name k8sThere are two ways to install the CRDs in the cluster. Simply run the below command,
$ make installOr navigate to the ~/demo-operator/config/crd/bases and execute the below command.
$ kubectl apply -f .Both do the same task.
Part 5: Running the Operator outside the Cluster
It's the simplest way to Run & Debug your operator logic. Also, to discover the internals of the k8s, it's the best option to start with.
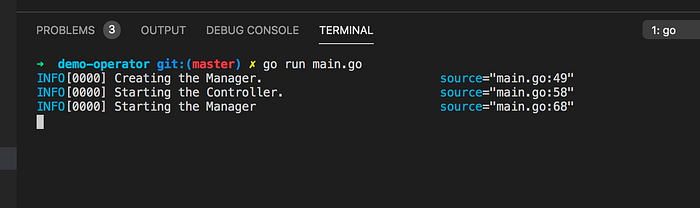
$ cd demo-operator
$ go run main.go
That's it. You should be able to see the below output.
Let's deploy our custom resource. Let's navigate to the samples directory and apply the resource.
$ kubectl create ns test
$ kubectl apply -f apps_v1_helloapp.yaml -n test
Let's check what is created inside the test namespace.
$ kubectl get all -n test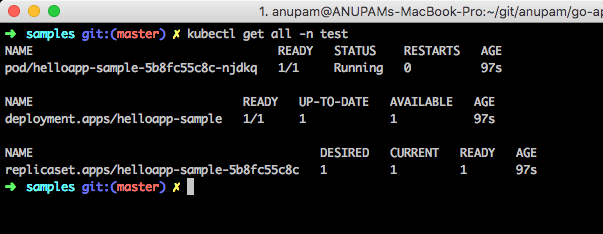
Now the most enticing part.
$ kubectl get HelloApp -n test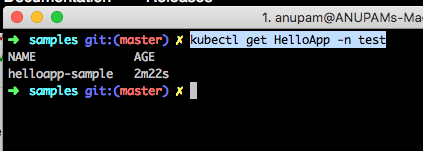
You can see that our custom resource is there. It's cool.
Part 6: Debugging the Operator outside the Cluster
This is the most exciting part of the article. We can debug each line of our operator which is an immense source of knowledge for its development.
To debug the operator, first of all, the CRDs must be installed in the cluster as shown in
Part 4: Installing the CRDs
Make sure that your local k8s cluster is up & running. When you install the Go plugin in your Visual Studio Code it installs the debugger also. So, simply click the Run → Start Debugging option of the VS Code, and the debugging configuration will be automatically done for you.
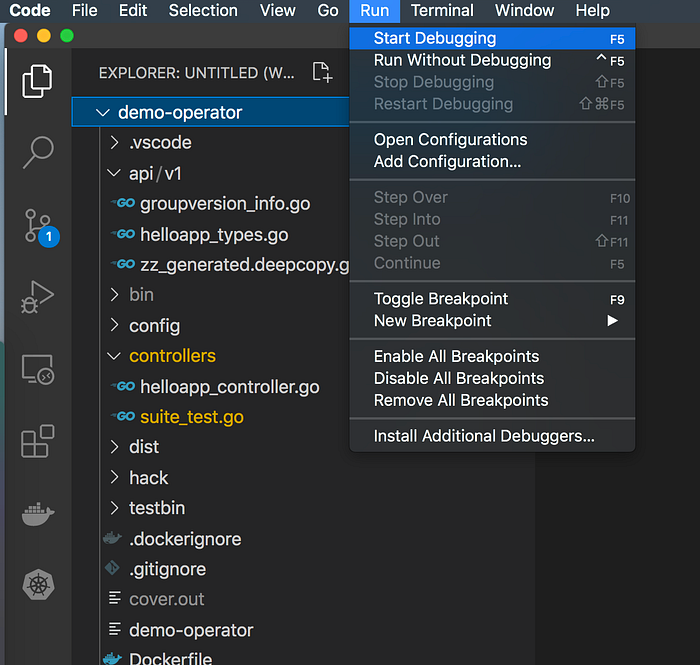
Then put breakpoints where you wish and there you go.

Now, open a terminal and browse to the ~/demo-operator/config/samples
directory and deploy the CRD.
$ kubectl apply -f apps_v1_helloapp.yaml -n testWhen it's created the first time, it will trigger the Reconcile loop and the program will stop at the breakpoints in the Reconcile function as shown in the above diagram. Also, for any Update or Delete, the Reconcile function will be called. You can play with it as much as you wish until you discover the internals of k8s.
Part7: Running the Operator inside the Cluster
A custom operator is nothing but a bunch of configuration files (YAML) and a docker image of the operator itself. The minimal configuration files we will need for our custom operator are:
- A config file to create a Namespace for the operator.
- A config file to create a Service Account.
- A config file to define the Roles that our operator needs to invoke the APIs of the k8s server.
- A config file to bind the Roles to the service account defined in step 2.
- Finally, a Deployment config file to deploy the operator itself.
Generating Roles for the Operator
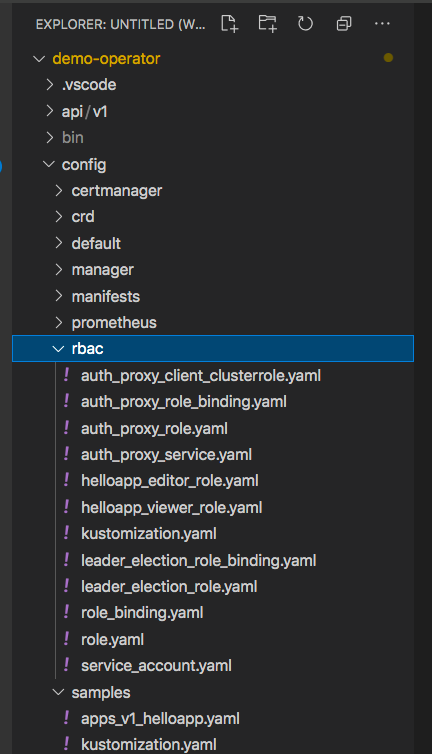
Under the folder ~/demo-operator/config/rbac, you can see there are lots of config files. But, we won't need all of them right now. But what roles we need?
Let's dig into our controller code.
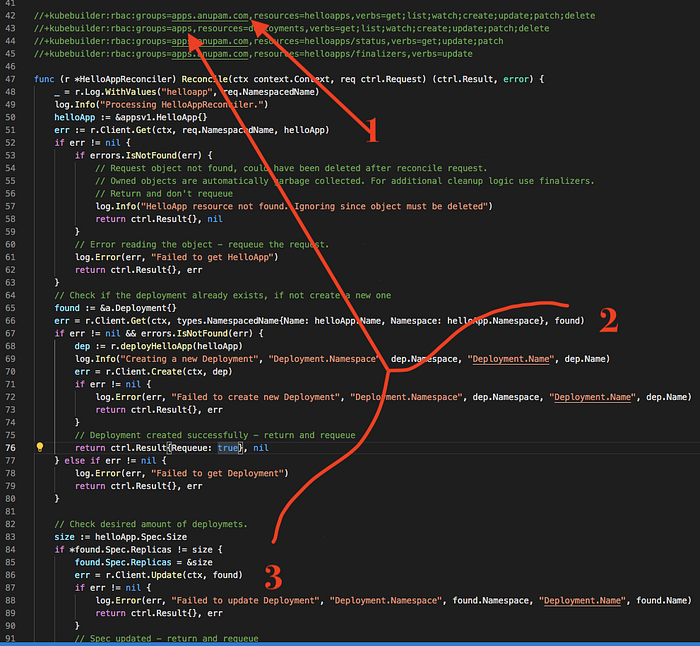
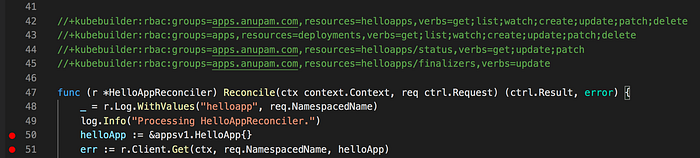
As shown in the above diagram, you can see that,
- At this point, we are doing a Get operation to check if there is a HelloApp resource present. So, we need permission to do the Get operation on resource HelloApp that belongs to the API group apps.anupam.com
2. Similarly, at this point we are doing a Get operation to check if there is a Deployment resource. Note that the Deployment resource of k8s belongs to the apps API group.
3. At this point we are doing an Update operation on resource Deployment that belongs to the apps API group.
Now, what are all these comments that start with a + sign?
//+kubebuilder:rbac:groups=apps.anupam.com,resources=helloapps,verbs=get;list;watch;create;update;patch;delete//+kubebuilder:rbac:groups=apps,resources=deployments,verbs=get;list;watch;create;update;patch;delete//+kubebuilder:rbac:groups=apps.anupam.com,resources=helloapps/status,verbs=get;update;patch//+kubebuilder:rbac:groups=apps.anupam.com,resources=helloapps/finalizers,verbs=update
They are called markers. You can read more about k8s markers in this guide. The controller-gen CLI uses these markers to generate all the artifacts (CRDs, RBAC, etc) for us.
Once these markers are added, just execute the make manifests command. It will generate/update all necessary stuff like CRDs, roles, role-bindings, etc.
Generating the Docker Image for the Operator
The custom operator will be shipped nothing more than a docker image and all its artifacts to deploy it in a k8s cluster.
If you check the project structure, there is already a Dockerfile generated for us by the Operator-SDK. We don't have to do anything manually.
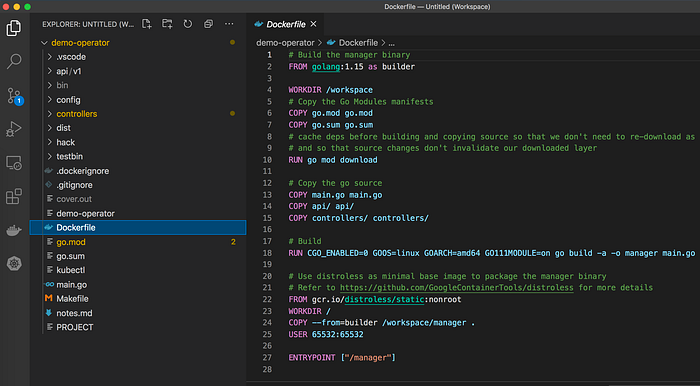
Now, go to the root of the project and execute the following command to build the docker image.
$ make docker-build IMG=anupamgogoi/demo-operator:latestPlease put your own docker repository to push the image. Once the image is generated, push it to the Docker registry by executing the following command.
make docker-push IMG=anupamgogoi/demo-operator:latestWe are done.
Finalize the shipment package
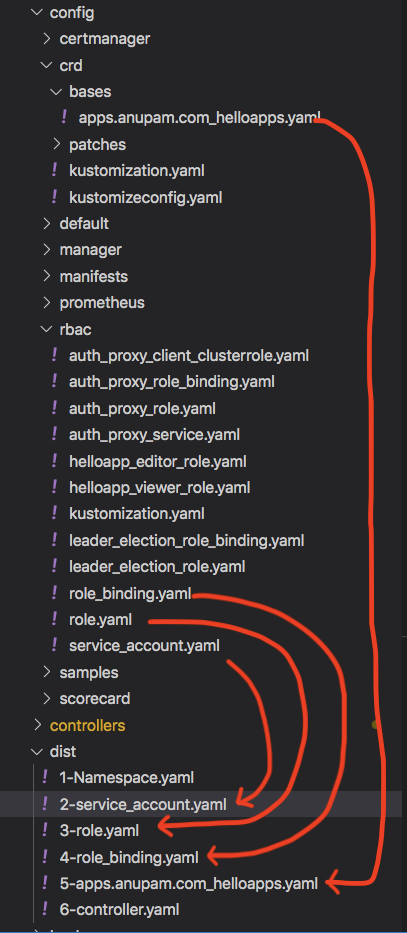
For simplicity, I will manually create a folder called dist in the same project and add the 5 files as described in the very first paragraph of this section.
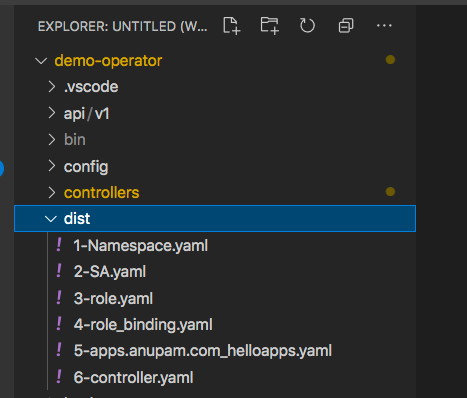
Create the 1-Namespace.yaml with a namespace that you prefer. The operator will be installed in this namespace. You can copy files 2, 3, and 4 from the rbac folder itself. Copy file 5 from the crd/bases folder. And finally, create the 6-Controller.yaml to deploy the operator. Just make sure to change the namespaces in the config files. Here are the complete files.
We are done.
Run the Operator inside the cluster
I have a 3 node k8s cluster created using CentOS VM. To learn about creating a k8s cluster please read this article. I will just download these config files to my k8s master node and deploy the operator. Let's do it.
I have copied the dist directory to the master node of my cluster and I will simply kubectl apply all the config files.
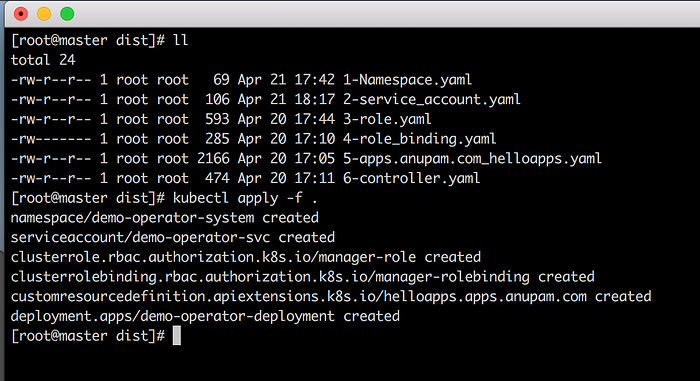
The namespace I specified to deploy the operator was demo-operator-system. Let's check if the operator was created in it.

Cool!. The custom operator is deployed and also the CRD. Note that the name of the CRD is helloapps.apps.anupam.com as specified in the config file 5-apps.anupam.com_helloapps.yaml.
Now we are good to create our custom resource or kind i.e the HelloApp. Let's open one more terminal of the master node to check logs of the custom operator while in another terminal we deploy the HelloApp resource.
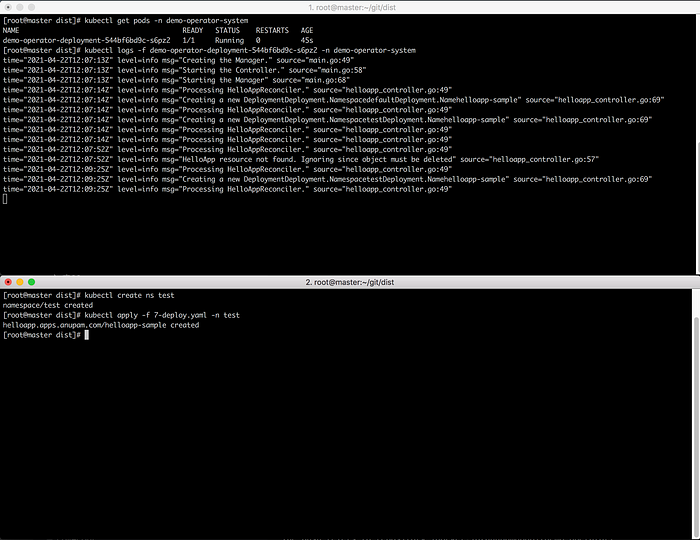
You can see in the above screenshot that as soon as the HelloApp custom resource is deployed (lower terminal) the logs were displayed in the first terminal (upper). This is the best way to debug the operator while deploying inside a k8s cluster.
Now let's verify if the deployment for the custom resource HelloApp was created.
$ kubectl get all -n testVoilà!!

The deployment is created and it, in turn, created the Pod as specified in the spec (size=1).
Let's access this application just inside the cluster. It can be done by calling the application in its Pod IP.
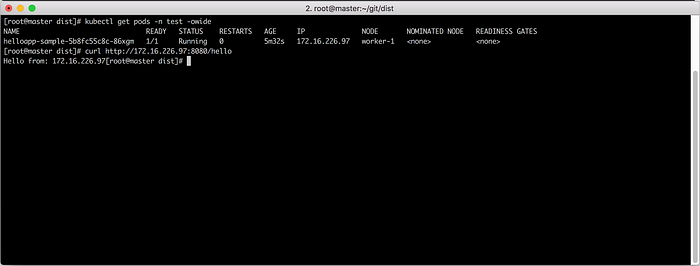
That's it. We have got our response from the application.
Conclusion
In this article, I tried to explain how to create a very simple k8s custom operator from zero using the Operator-SDK. But, please feel free to create your custom operator using any language of your choice. Operator implementation is not limited only to Go lang. Do give it a try!
Thanks for reading.